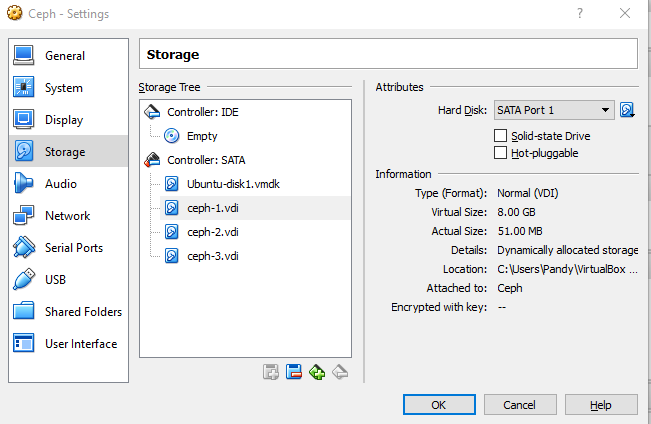
Today going to see how to integrate ceph with devstack and mapping ceph as backend for nova, glance, cinder.
Ceph is a massively scalable, open source, distributed storage system. Ceph is in the Linux kernel and is integrated with the OpenStack cloud operating system.
Setup Dev Environment
Install OS-specific prerequisites:
sudo apt-get update
sudo apt-get install -y python-dev libssl-dev libxml2-dev \
                        libmysqlclient-dev libxslt-dev libpq-dev git \
                        libffi-dev gettext build-essential
Exercising the Services Using Devstack
This session has only been tested on Ubuntu 14.04 (Trusty), if you don’t have create on Virtual box with 4GB RAM, 100 GB HDD.
Clone devstack:
# Create a root directory for devstack if needed
sudo mkdir -p /opt/stack
sudo chown $USER /opt/stack

git clone https://git.openstack.org/openstack-dev/devstack /opt/stack/devstack
We will run devstack with minimal local.conf settings required to enable ceph plugin along with nova & heat, disable tempest, horizon which may slow down other services here your localrc file
#[[local|localrc]]
#######
# MISC #
########
ADMIN_PASSWORD=admin
DATABASE_PASSWORD=$ADMIN_PASSWORD
RABBIT_PASSWORD=$ADMIN_PASSWORD
SERVICE_PASSWORD=$ADMIN_PASSWORD
#SERVICE_TOKEN = <this is generated after running stack.sh># Reclone each time
#RECLONE=yes# Enable Logging
LOGFILE=/opt/stack/logs/stack.sh.log
VERBOSE=True
LOG_COLOR=True
SCREEN_LOGDIR=/opt/stack/logs
#################
# PRE-REQUISITE #
#################
ENABLED_SERVICES=rabbit,mysql,key
#########
## CEPH #
#########
enable_plugin devstack-plugin-ceph https://github.com/openstack/devstack-plugin-ceph# DevStack will create a loop-back disk formatted as XFS to store the
# Ceph data.
CEPH_LOOPBACK_DISK_SIZE=10G# Ceph cluster fsid
CEPH_FSID=$(uuidgen)# Glance pool, pgs and user
GLANCE_CEPH_USER=glance
GLANCE_CEPH_POOL=images
GLANCE_CEPH_POOL_PG=8
GLANCE_CEPH_POOL_PGP=8# Nova pool and pgs
NOVA_CEPH_POOL=vms
NOVA_CEPH_POOL_PG=8
NOVA_CEPH_POOL_PGP=8# Cinder pool, pgs and user
CINDER_CEPH_POOL=volumes
CINDER_CEPH_POOL_PG=8
CINDER_CEPH_POOL_PGP=8
CINDER_CEPH_USER=cinder
CINDER_CEPH_UUID=$(uuidgen)# Cinder backup pool, pgs and user
CINDER_BAK_CEPH_POOL=backup
CINDER_BAK_CEPH_POOL_PG=8
CINDER_BAKCEPH_POOL_PGP=8
CINDER_BAK_CEPH_USER=cinder-bak# How many replicas are to be configured for your Ceph cluster
CEPH_REPLICAS=${CEPH_REPLICAS:-1}# Connect DevStack to an existing Ceph cluster
REMOTE_CEPH=False
REMOTE_CEPH_ADMIN_KEY_PATH=/etc/ceph/ceph.client.admin.keyring#####################
## GLANCE – IMAGE SERVICE #
###########################
ENABLED_SERVICES+=,g-api,g-reg##################################
## CINDER – BLOCK DEVICE SERVICE #
##################################
ENABLED_SERVICES+=,cinder,c-api,c-vol,c-sch,c-bak
CINDER_DRIVER=ceph
CINDER_ENABLED_BACKENDS=ceph###########################
## NOVA – COMPUTE SERVICE #
###########################
ENABLED_SERVICES+=,n-api,n-crt,n-cpu,n-cond,n-sch,n-net
#EFAULT_INSTANCE_TYPE=m1.micro#Enable heat services
ENABLED_SERVICES+=,h-eng h-api h-api-cfn h-api-cw#Enable Tempest
#ENABLED_SERVICES+=tempest’ inside ‘local.config
Now run
~/devstack$ ./stack.shDevstack will clone with master & ceph will be enabled & mapped as backend for cinder, glance & nova with PG pool size 8, can create own size in multiples of 2 power like 64 as your wish.
Sit back a while to clone devstack and get result as like below
=========================
DevStack Component Timing
=========================
Total runtime 2169run_process 26
apt-get-update 52
pip_install 99
restart_apache_server 5
wait_for_service 20
apt-get 1653
=========================This is your host IP address: 10.0.2.15
This is your host IPv6 address: ::1
Keystone is serving at http://10.0.2.15/identity/
The default users are: admin and demo
The password: admin
Check the health of ceph with root permission, see “HEALTH_OK”
pandy@malai:~/devstack$ sudo ceph -s
cluster 6f461e23-8ddd-4668-9786-92d2d305f178
health HEALTH_OK
monmap e1: 1 mons at {malai=10.0.2.15:6789/0}
election epoch 1, quorum 0 malai
osdmap e16: 1 osds: 1 up, 1 in
pgmap v24: 88 pgs, 4 pools, 33091 kB data, 12 objects
194 MB used, 7987 MB / 8182 MB avail
88 active+clean
Here you go, ceph is installed with devstack


